


If you can no longer stand the Instagram beauty of doors with wreaths of bright autumn leaves and your soul asks for creativity, our article will help you.
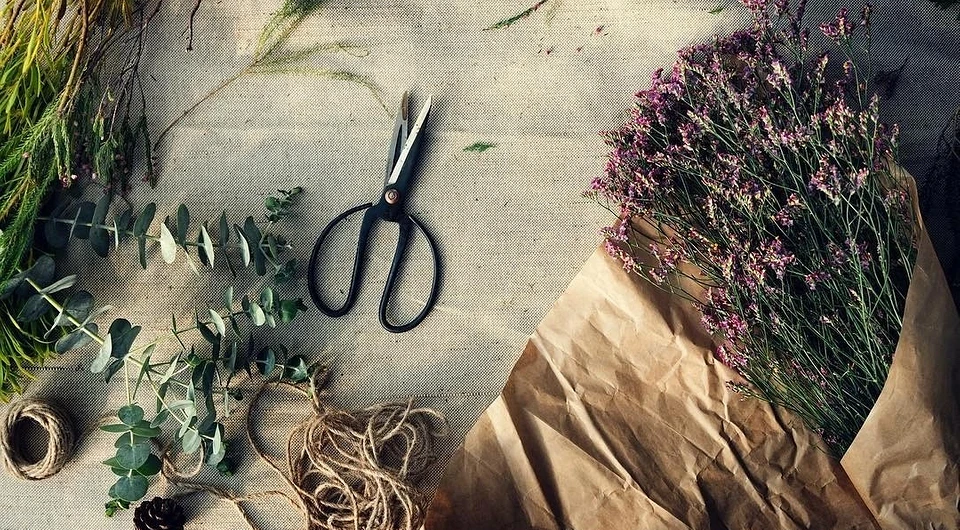
For the garland you will need:
- Base: strong long branch
- Materials for decoration: dried leaves, cut-out leaves from strong cardboard, pine cones, and acorns. You can diversify the garland with photographs
- Materials for fastening: nails, buttons, second glue, threads
- Tools: sewing needles and awl, hammer
- Additionally: spray paint optional, acrylic paints
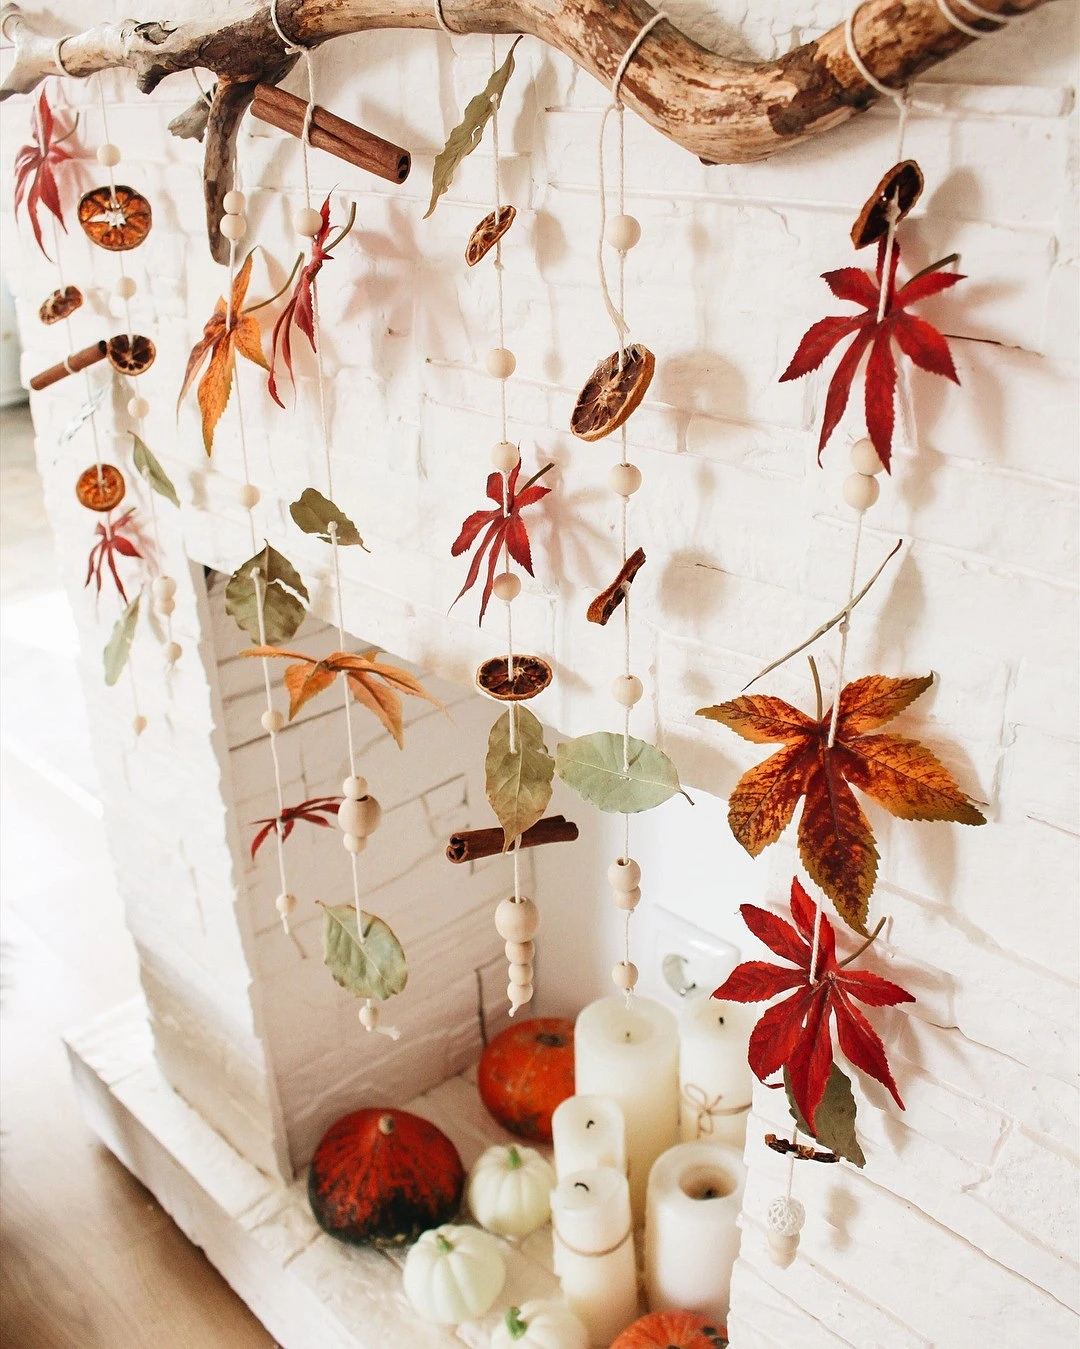
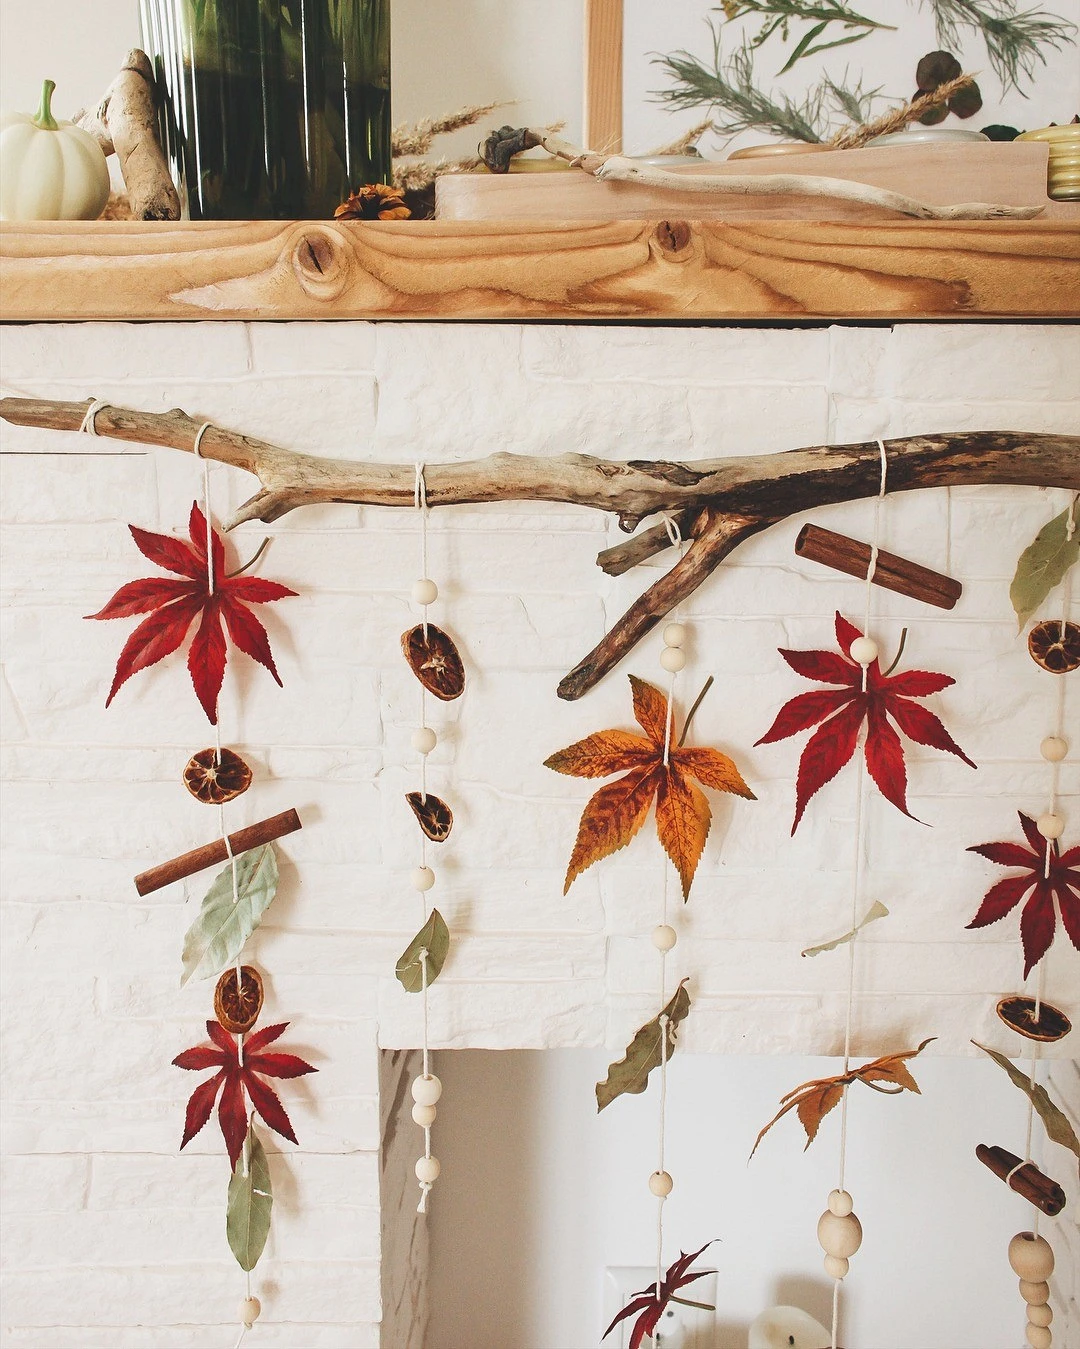
How to make a garland
On a long branch, use a thin marker to mark the places where the nails will be driven in. This is important so that there is a step of the same size between the parts of the garland. Ropes are tied to the driven nails (jute looks the most authentic, but other strong ropes can be used), and decoration elements are attached to these ropes. You can fasten them using the same ropes if you make a hole in the decor – using a needle, an awl or a small drill. You can make bows where the ropes are tied to nails and decor to disguise the knots. The finished garland can be sprayed with gold spray paint. You can also apply repeating stripes or other simple patterns to the branch using a thin brush and acrylic.

The garland is hung on an empty wall or suspended from a cornice. It can also be used to decorate a false fireplace if you have one.
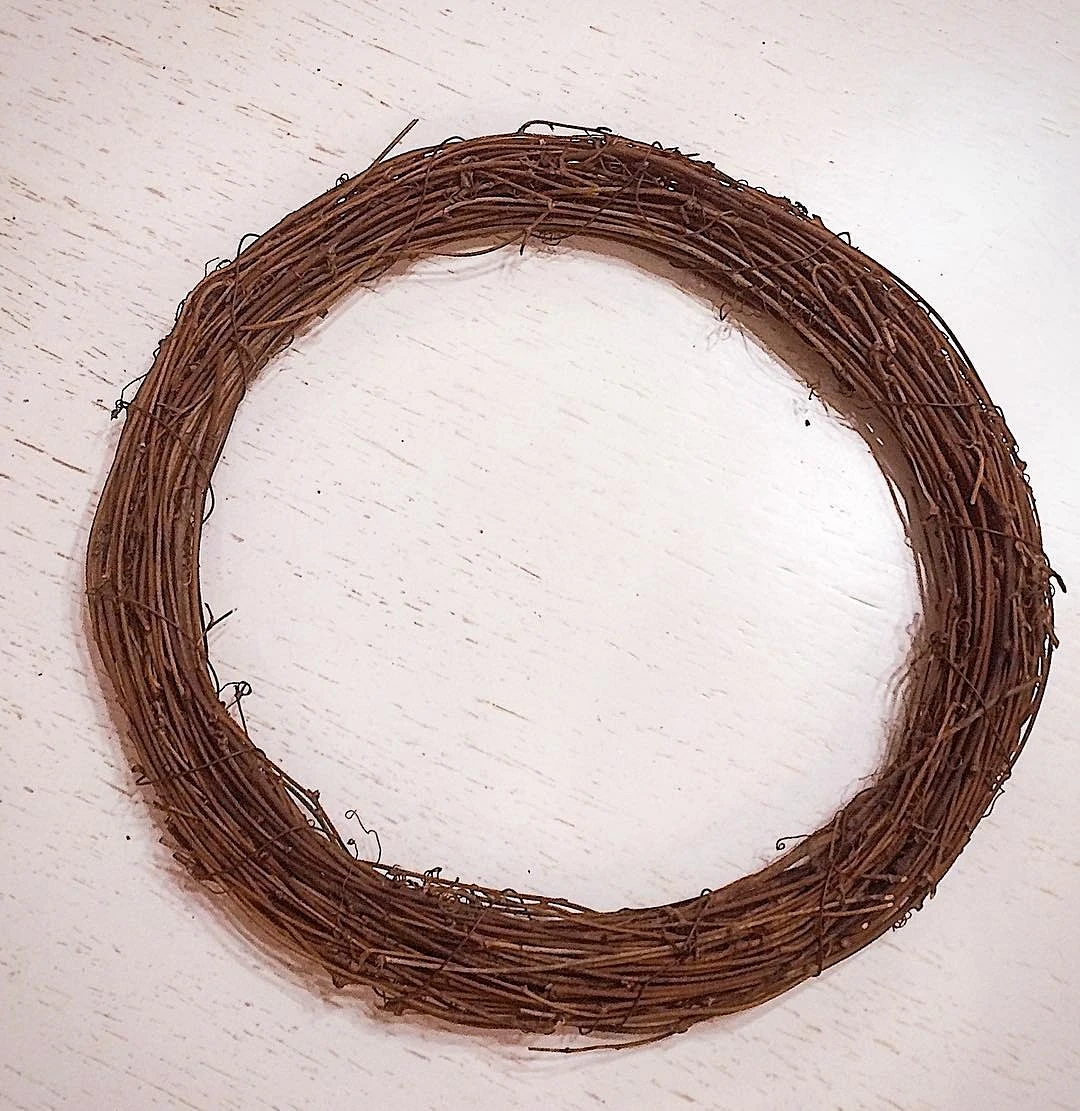
For the wreath you will need:
- Material for the frame: it can be branches/wire/hoop or a ready-made frame for a wreath from craft stores
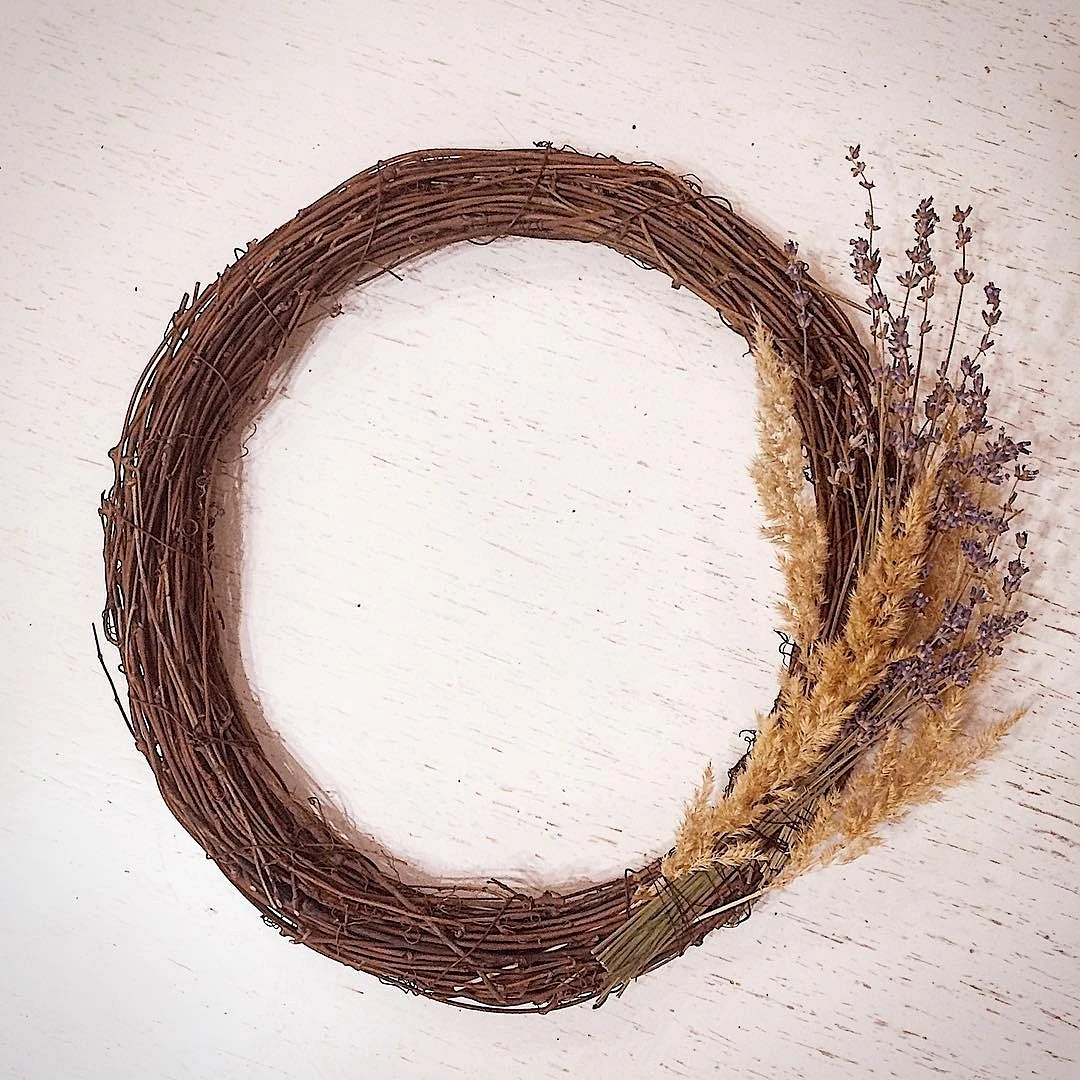
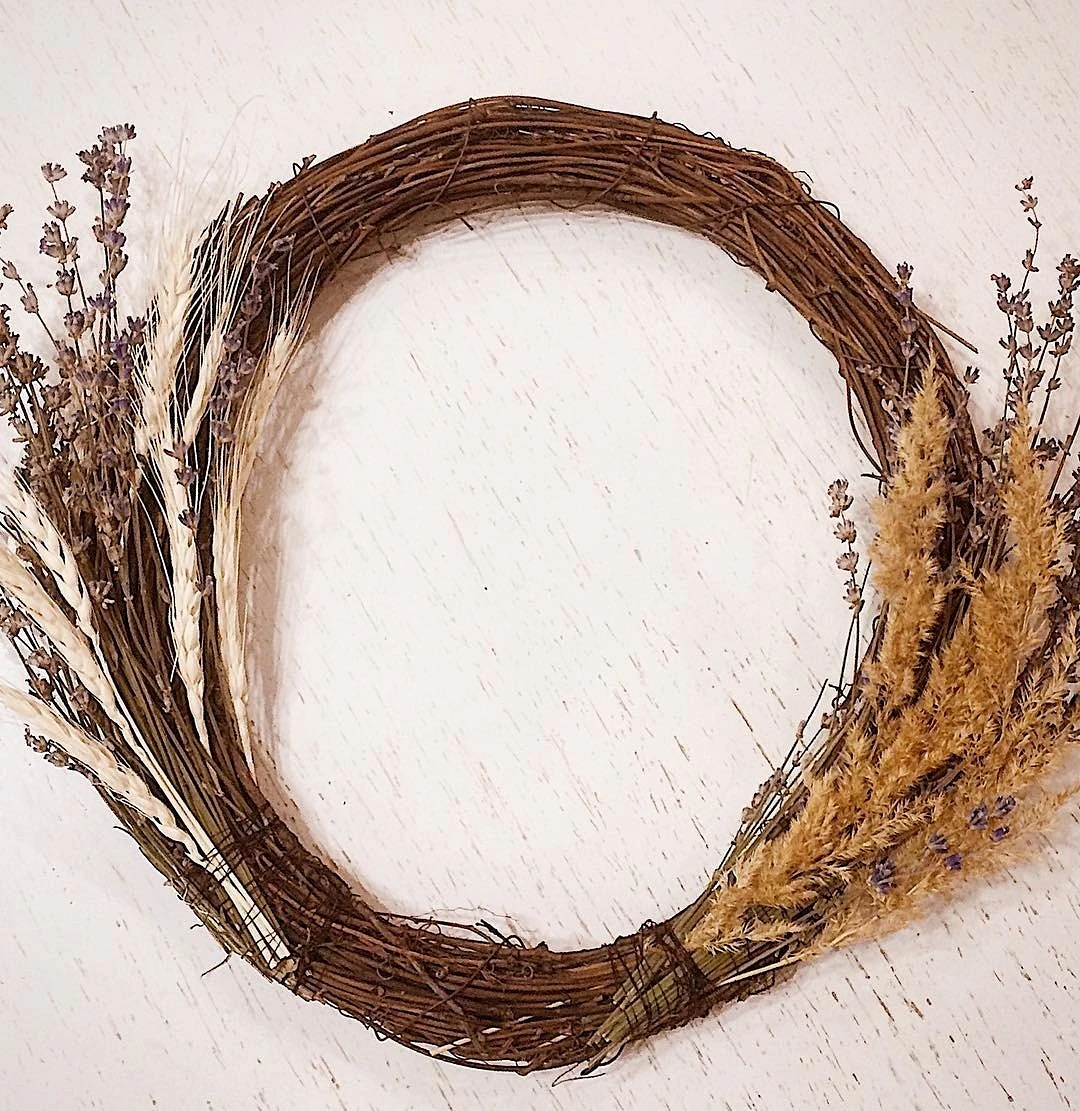
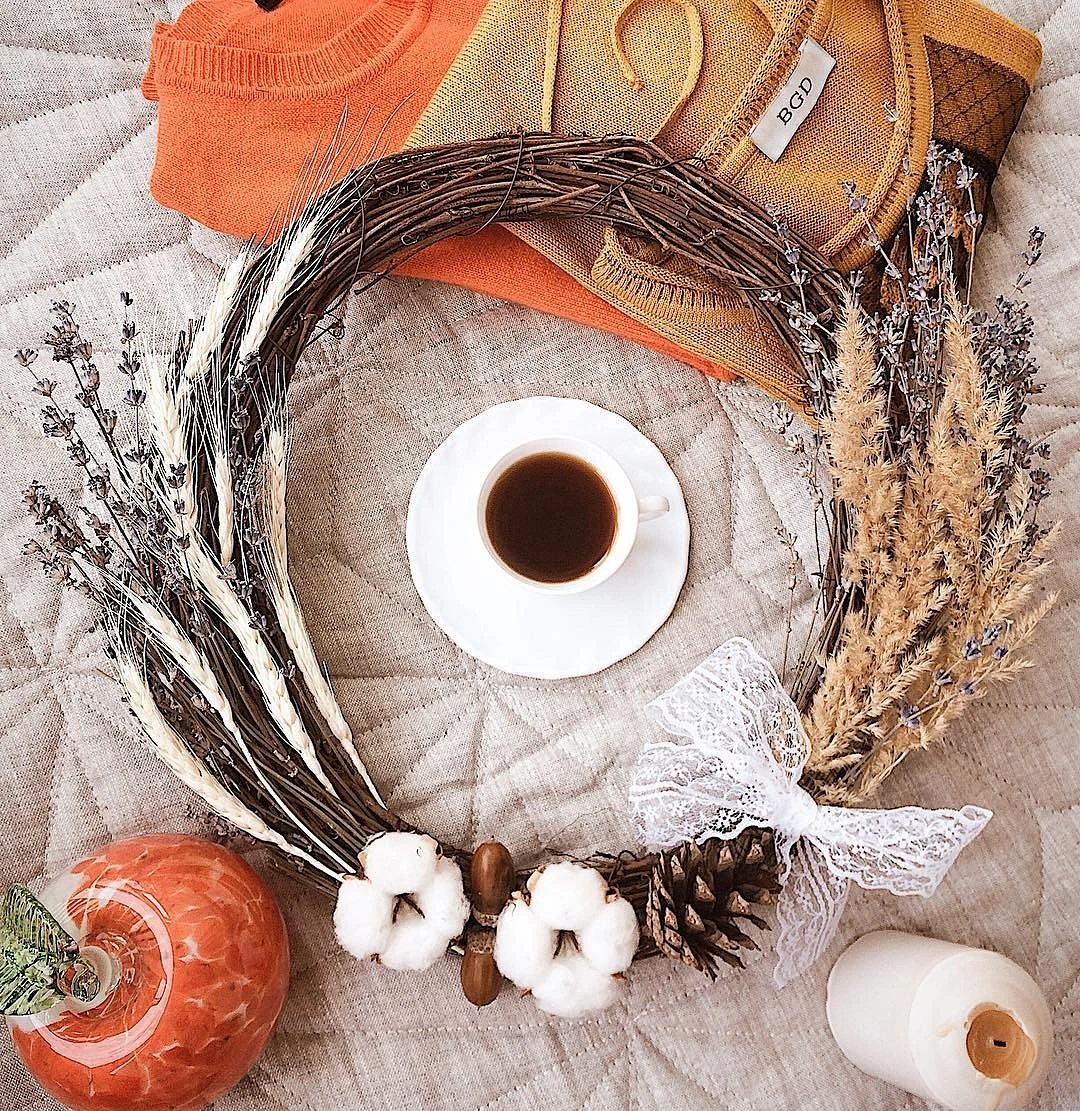
- Materials for decoration: you can use dried autumn leaves, dried and artificial berries like rowan, dried roses and other dried flowers, wine corks, ears of wheat, acorns, pine cones, cinnamon sticks and anise, physalis, ribbons, battery-powered LED garlands (your imagination here practically unlimited)
- Materials for fastening: jute rope, glue moment, stapler
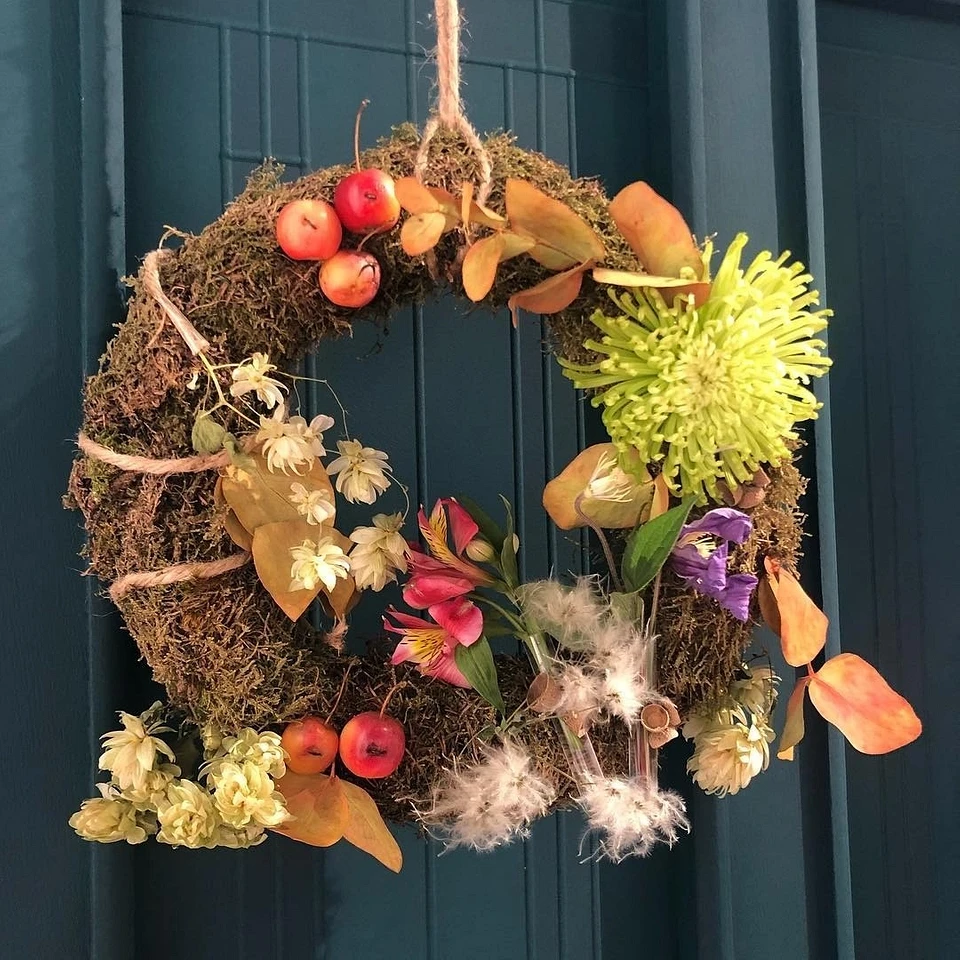
How to weave a wreath
Fresh, recently collected branches bend easily, but dry and old branches that break easily are recommended to be soaked in boiling water first so that they bend more easily. At the collection stage, choose thin branches that are easier to bend. It is recommended to take birch, and in the absence of it, willow.
When the branches are prepared, you need to lay them out on the table. Next, separate as many sticks from the total mass of branches as you need to create the lightest layer of the wreath and arrange them on the work surface so that they form the shape of a wreath. At this stage, you can decide on the size of the wreath. Now the thin ends of the branches need to be connected to the thick ends, as if head to feet. Then wrap the thin ends around thick branches.
Next, we move on to the stage of strengthening the wreath, gradually braiding it with new branches and increasing its volume. Small branches need to be hidden inside the wreath so that they do not stick out. Now that your wreath is strong enough and does not fall apart in your hands, it should be additionally braided with wire for reliability. Trim the excess wire and hide the ends behind the back of the wreath. Then you can decorate the wreath to your liking.
The most important thing about our X that it is for
those who are in a hurry


